How to offer Shopify automatic discounts to specific customers
3/8/2023 · 5 minute read
Disclaimer: This guide uses custom theme code. Pasting code into a theme is not always guaranteed to work. For example: If you're using an unofficial theme, or other custom code, or apps are affecting normal theme functionality. In these cases it's possible that the new code won't be effective.
Shopify has several different ways you can offer discounts to your products. Compare-at price lets you display the discounted price next to the new price. Plus stores have Scripts and Checkout Functions to configure discounts to products and orders.
But the most frequent way is by using automatic discounts, and discount codes.
However, a very common question is: how do I create a discount, that automatically applies to specific customers?
Unfortunately, automatic discounts only apply based on the cart. This means that you can't offer an automatic discount to specific customers.
So, what's the solution?
Discount codes are the only other option. How do we use them to offer discounted prices without any manual action by the user?
This guide assumes you don't want to install and pay for an app. It only involves native Shopify features, and some custom code. Read some benefits of custom development vs. apps here.
Create a customer segment
First of all, you need to determine who you want to offer the discount to.
The most common occasion is when you want to offer it to customers with a specific tag.
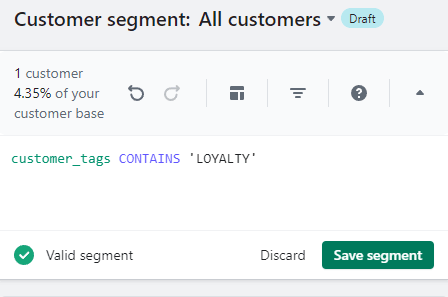
This is a perfect use case for Customer segments.
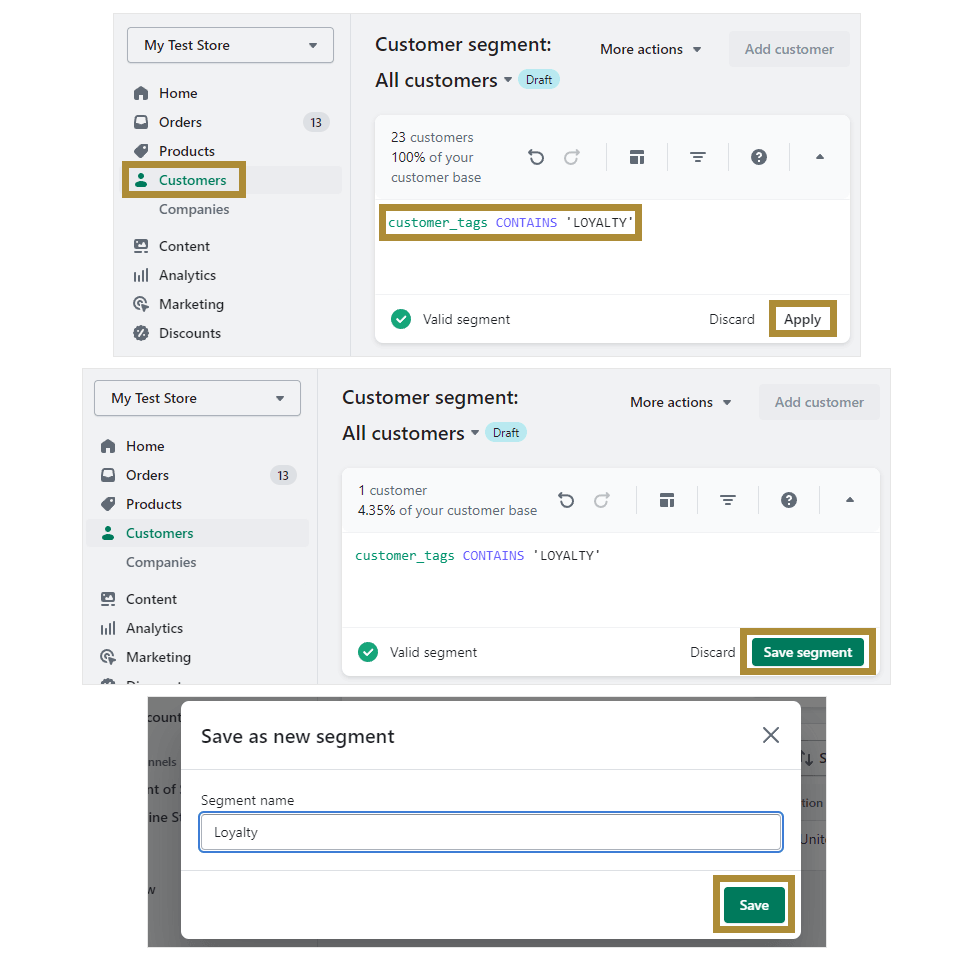
What you need to do, is create a segment based on the tag. For example, if the customers are already tagged as "Loyalty", you can go into the Customer segments and create a filter: customer_tags CONTAINS 'Loyalty'.
You can read more instructions about this here.
The plan
Discount codes, in general, need to be used on the checkout directly. But what if you don't want to make users type in the code, even if you could place it on a prominent banner?
Here's the answer: There are ways to programmatically apply discount codes, with some simple theme code. Here's the plan:
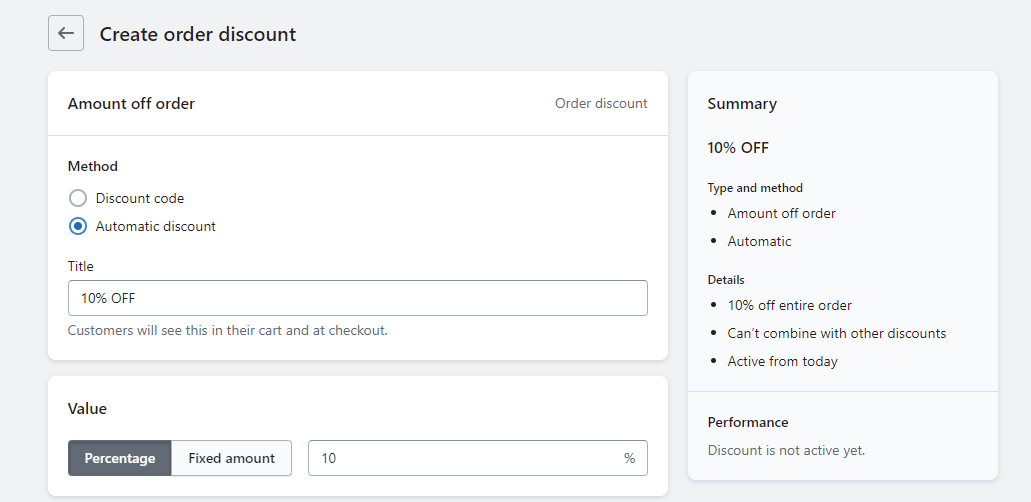
Create a discount code that gets applied to specific customer segments.
Add a small snippet to your theme, that automatically applies the discount code on checkout for your chosen customers.
Implement the custom automatic discount
1. Create the segment (read section 1) and discount code for the customers you want it to apply to.
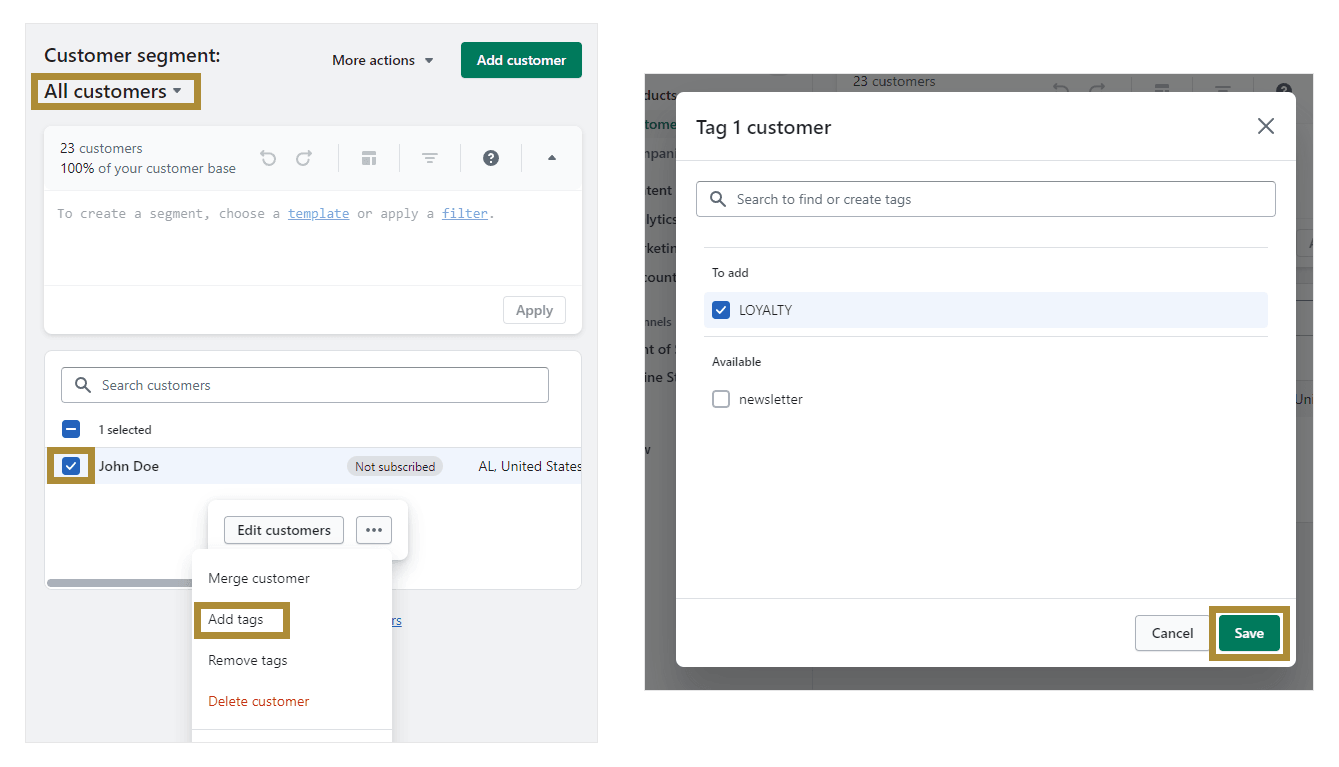
2. Select the "All customers segment again and tag the customers.
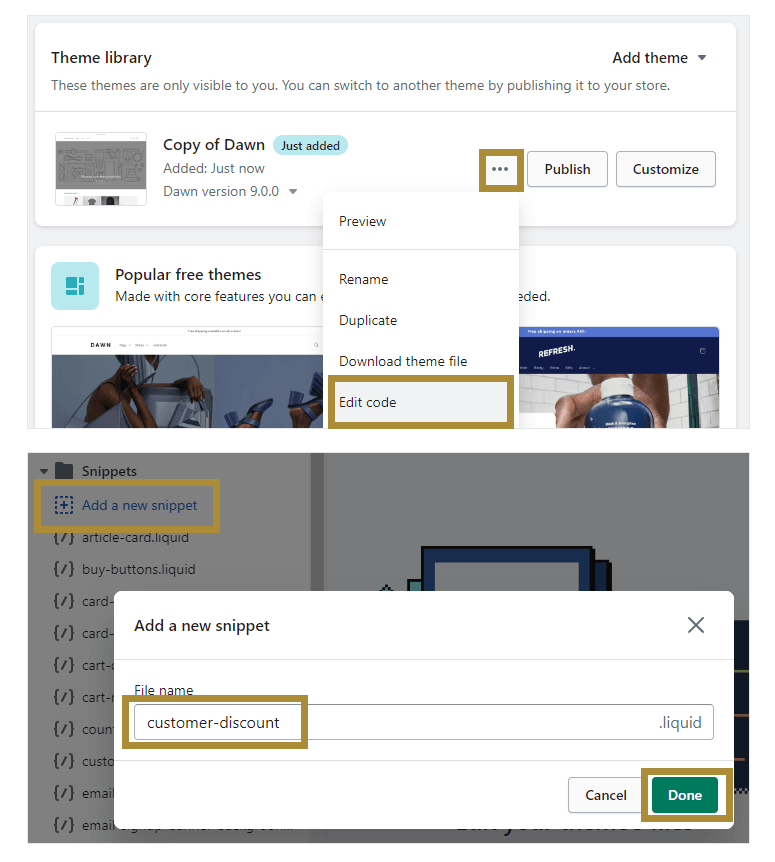
3. Create a duplicate of your theme, that you'll work on. This helps prevent issues with your live store.

4. Open the theme's code, and locate the Snippets folder on the sidebar. Add a new snippet named "customer-discount". This will create a new Liquid file.
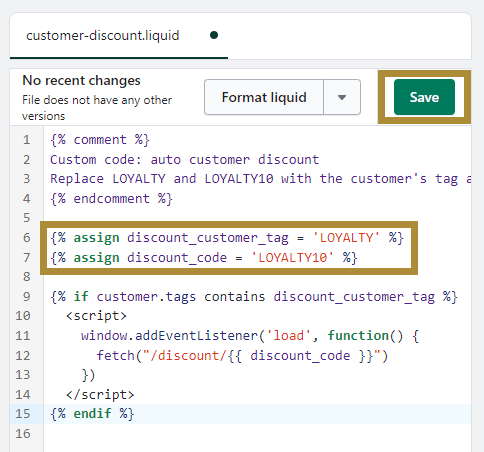
5. Paste the below code into the code editor.
{% comment %}
Custom code: auto customer discount
Replace LOYALTY and LOYALTY10 with the customer's tag and discount code
{% endcomment %}

{% assign discount_customer_tag = 'LOYALTY' %}
{% assign discount_code = 'LOYALTY10' %}

{% if customer.tags contains discount_customer_tag %}
  <script>
    window.addEventListener('load', function() {
      fetch("/discount/{{ discount_code }}")
    })
  </script>
{% endif %}
6. Replace the variables with your own tag and discount code, and save.
7. From the sidebar, open the theme.liquid file.
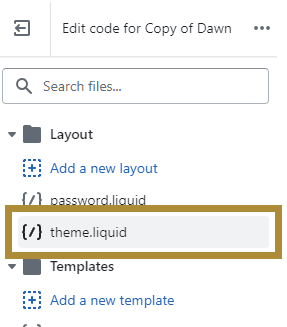
8. Scroll down to the bottom, find the </body> tag, and insert the below code right before it, then save.
{% render 'customer-discount' %}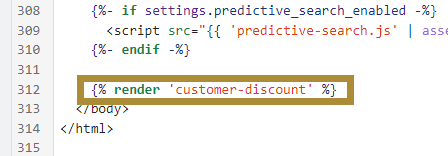
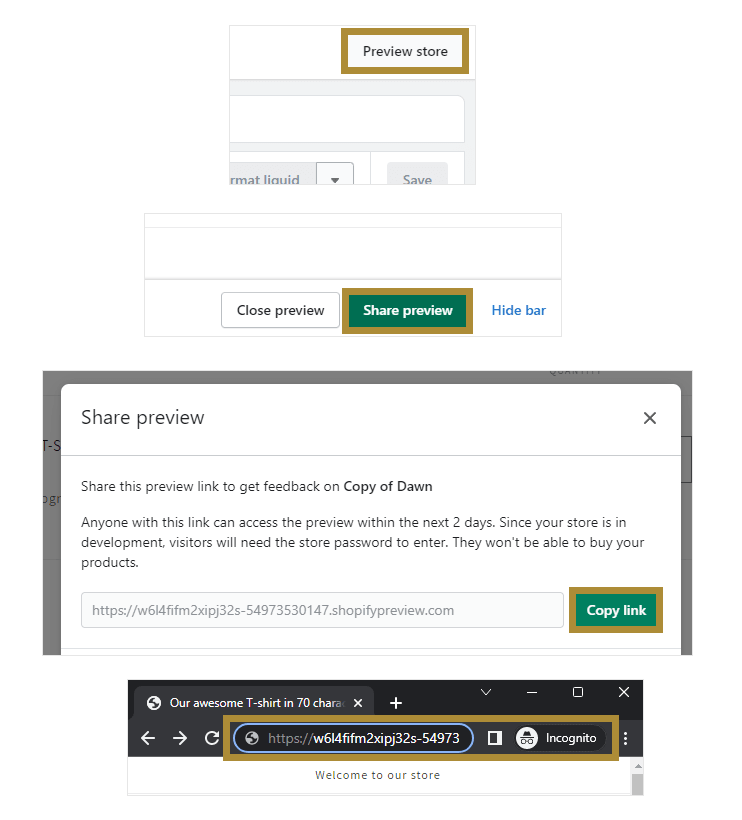
9. Click the "Preview store" button to test the feature on the new theme. I've found that checkout doesn't work if you're logged in as an admin, it's best if you get a Share Preview link and visit it on an incognito tab.
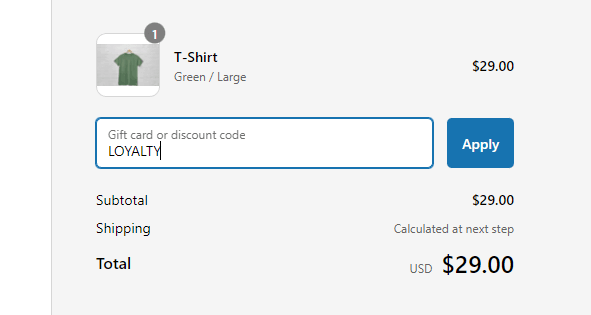
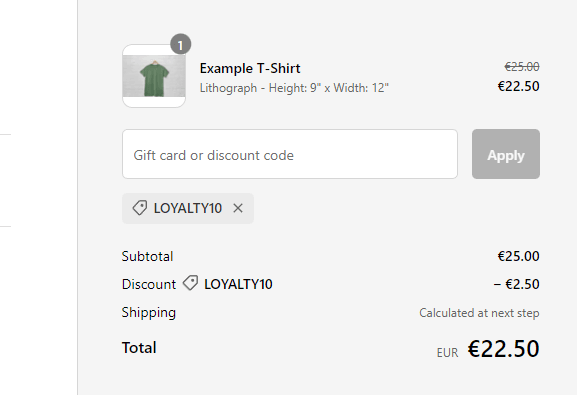
10. Log in as a user that's tagged with the same tag, add a product to cart, and go to checkout. You should be seeing the discount code, automatically applied.
11. Perform further testing. Trying to log out and back in, use other discount codes and automatic discounts, use any apps you have etc.
12. Publish the new theme. If there are changes on the live theme since you duplicated it, you will need to merge them.

How it works
Here's what happens on the website now:
1. When a user opens a page on the site, the if statement checks a) whether they're logged in, b) whether have the tag you set up.
2. If not, the new code doesn't load. If yes, the new code loads and gets executed.
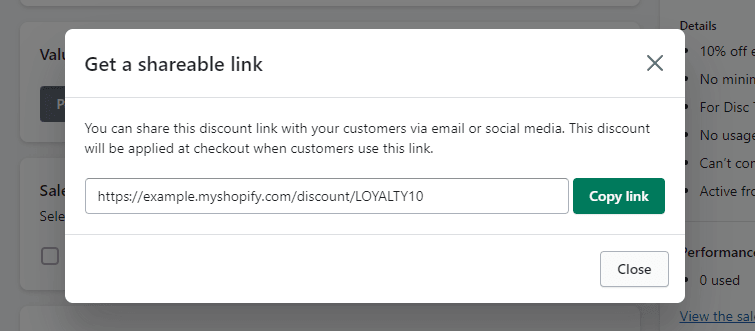
3. All the code does, is it sends a request to the /discount/THE_DISCOUNT_CODE endpoint of your store. This endpoint applies the discount in the background, and that's eventually visible on checkout. It's the same as when you get a shearable link of the code.
To keep things simple, and prevent issues with the user removing the code, logging out etc., the script runs every time a page loads. Impact to the site's loading speed is minimal, because the script runs only after the page has loaded.
Next steps
While this takes care of how a discount applies automatically, and contributes to an optimized Shopify checkout, there are further steps you may want to take. For example, you might want to display discounted prices throughout the site. These additions need code that depends on your theme, so they're impossible to include in this tutorial.
An alternative is to display a message on the site. (Read some tips on how to design something like that, here.) For example, "10% off for Loyalty members". This could even be added to a Custom Liquid section on your theme, like so:
{% if customer.tags contains discount_customer_tag %}
  10% off for Loyalty members
{% endif %}
Thanks for reading! If you need help implementing this, feel free to reach out using the contact form below.