Shopify image sizes: the 3 step method for optimal configuration
9/13/2021 · 17 minute read
Images are perhaps the most important visual element of most stores.
The first thing a person sees when they visit a physical store is the storefront. They get to see the products, and these products look as good as possible.
So think about your Shopify store’s images.
They are a part of the buying process.
They are a part of user experience.
And they are a part of your brand.
It’s obvious that we need to make images look as perfect as possible.
Unfortunately, thousands of Shopify stores don’t have their images set up correctly. For example, image file sizes that are too large for a website. Or image resolutions that look low-quality. Or image dimensions that break the entire layout.
This guide has everything you’ll ever need, when it comes to Shopify image sizes.
You’ll learn why image sizes are really important, with real life examples and data.
You’ll be guided through the exact steps you can take, to get every image size perfect.
There’s also a bunch of extra tips with specific examples, and all the tools you’ll ever need, in one place.
Why should I care about Shopify image sizes?
Here’s the straight up answer: Because they can potentially lead to a decrease in revenue. A bad configuration might cost you a lot.
You might not believe this. So let me explain in detail.
First, we need to make a really important distinction.
By sizes, we either mean the image dimensions in pixels, or the image file size.
This guide explores both of these.
Reason 1: How the image file size can affect speed and conversions
Compressing images is one of the easiest ways to optimize its speed.
We’ll run a test.
We have a fresh Shopify store with the Dawn theme. Testing is done on mobile devices, with Google Lighthouse. The page is the product page, and images are uploaded with the recommended product image size of 2048 x 2048px. More than two audits are run in all cases.
Testing an uncompressed image
Initially, I’m using uncompressed images for my products. The product image size I uploaded, in this case meaning the file size, is 267kB.
The Performance score of the page is ~46.
The Largest Contentful Paint is how long it takes for the user to see the biggest part of the page when it loads.
In this case, the LCP is our product image. It’s at ~4.4s.
Testing a compressed image
I’ll use compressjpeg.com to compress my product image and upload it again.
The file size is now 134kB (-49%).
It now takes less time for the browser to load the image. New Performance score: ~51.
And the LCP? It’s ~4.1.
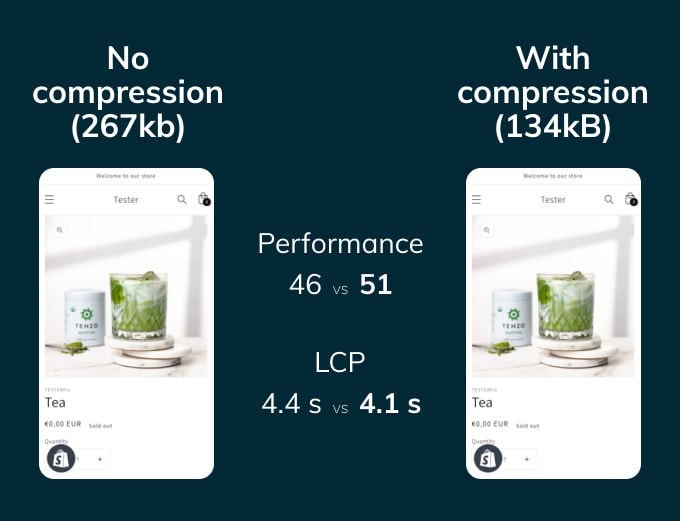
We see a difference in load time, with only one image.
Imagine having all of our images compressed. Imagine having 30 images shown on a collection page. I know these are smaller, but they’re not one, they’re many.
Now, there’s research that a one-second delay results in a 7% drop in conversions.
Why? Bounce rate.
People will abandon a site if it takes too long to load on their device, and their particular network conditions.
In our example, we have an extra delay of about one third of a second.
Do you want to do the math for your own business?
How many monthly conversions do you have? How much profit are you making from each sale?
If you’re selling 1,000 products a month for the price of $100 each, a 2% decrease is $2000.
And that’s not all.
The page speed score and the Web Vitals (LCP included) is a factor to SEO.
A good performance score means a good user experience. This leads to a boost in Google ranking. How much traffic are you getting from Google right now?
Reason 2: How the image size in pixels can affect trust and conversions
I’ll give you three examples that I commonly see in Shopify stores.
1. The cropped banner text
The store owner uploads an image for their banner.
Looks great on desktop. Looks great on their iPhone 12 Pro Max.
But when they visit the page on a Samsung Galaxy S8:
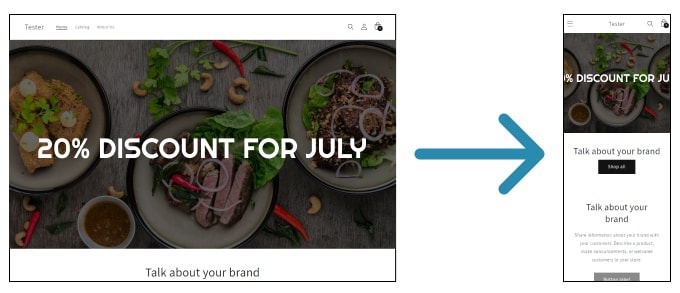
The reason?
They didn’t follow proper guidelines for banner image sizes.
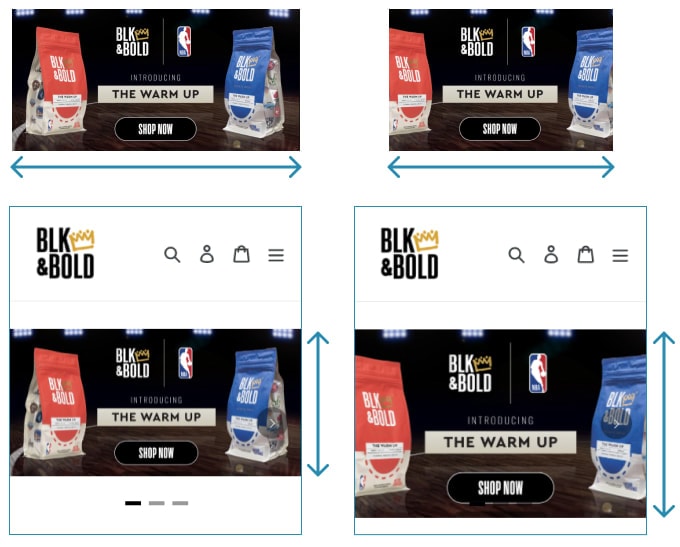
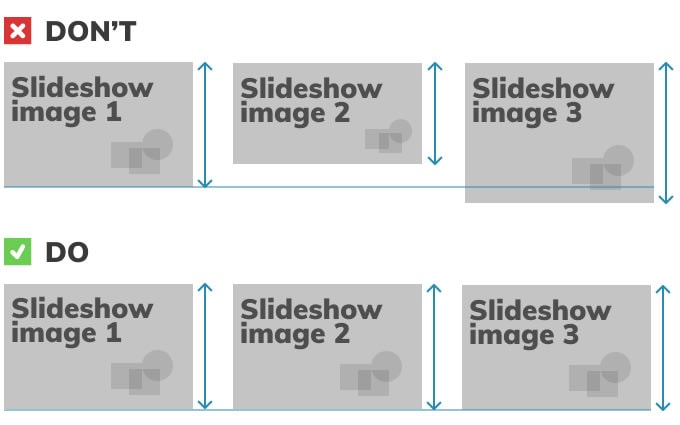
2. The shifting product slider
Take a look at this and ask yourself if it’s annoying or not:
Different image heights cause the slider thumbnails to move up and down every time you switch images. And this makes it hard to click on them.
The reason? Improper product image size.
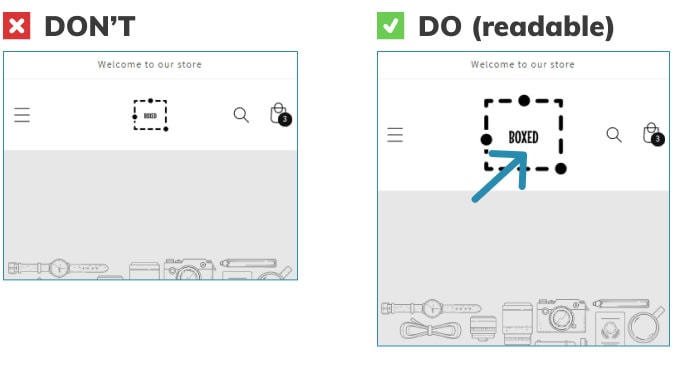
3. The blurry logo
That’s a frequent one.
(best seen on desktop)
A non-recommended logo size was uploaded here, on the second example. The first logo looks crisp, the second one is blurry.
The logo is one of the first things that your visitors use to evaluate the entire website. That’s within milliseconds.
What this means
Did you ever visit a website and disliked it immediately?
How important is user experience for you?
Is there a chance that a store was that hard to use, that even if you didn’t realize it, you left and never purchased from them?
It’s hard to measure how much these issues cost you.
One thing we know? When people have a negative experience on mobile, they’re 62% less likely to purchase from you in the future.
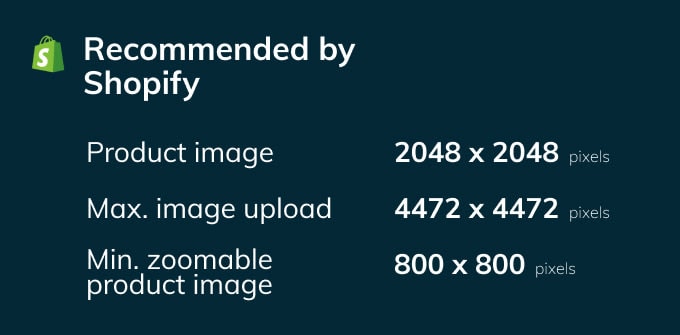
What image sizes does Shopify recommend?
The recommended by Shopify product image size is 2048 x 2048 pixels.
The maximum set by Shopify image size is 4472 x 4472 pixels or up to 20MB.
Shopify also recommends at least 800 x 800 pixels in product images, for the zoom functionality to work.
For a full list of my recommendations, and their meaning, keep reading.
What are the formats that I should know about?
Formats are file types, in essence.
Just like a document can be a PDF, DOC, TXT file, it’s the same for images.
The two file types that you will use 99.9% of the time, are JPG and PNG.
JPG
JPG is the format you’ll be using almost all of the time. It’s the most popular format on the web. Smaller image file sizes than PNG.
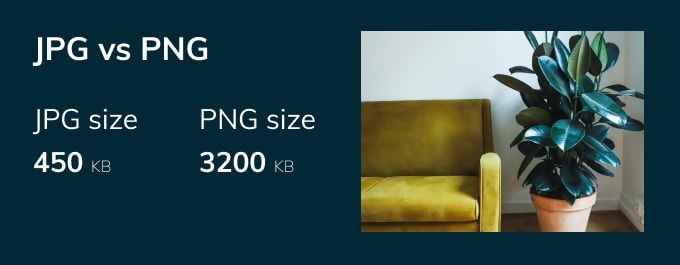
JPG images don’t allow transparency. You can’t upload an image and have its background take the color of your website’s background.
PNG
Larger sizes compared to JPG, but they allow you to set a transparent background in the image file.
There are tools that allow you to remove the background of images, or turn a JPG image into a PNG with a transparent background.
GIF
A GIF is something like a video. Essentially, a series of images shown one after the other. They can be used in most places where you could use any other image.
Use them if you need to give some motion to your site without adding custom code or video.
Here’s a really useful tool for editing GIFs.
Keep in mind, GIF file sizes can explode. The browser downloads a GIF all at once. If the image is >1MB, consider a video that can load progressively.
SVG
Scalable vector graphics. They are in fact a text of instructions for the browser (e.g. go from point 0,0 to point 10,10 and draw a line).
This makes their sizes tiny compared to other formats. But they should only be used for images made of basic shapes.
A logo is a great example of an image that could be saved as an SVG file.
Formats you won’t use
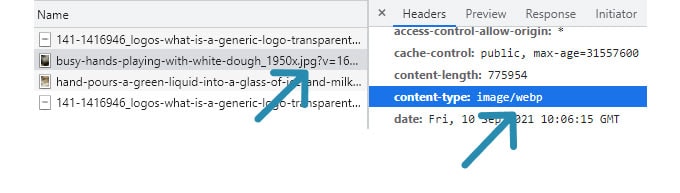
WebP is a more recent image format. Images have a smaller file size than JPG, but not 100% of browsers support it.
Shopify can determine if your browser supports it, and automatically send WebP images instead of e.g. JPG. You can’t see it in the file extensions when you look at the code, but it’s there.
BMP is something that you can see Windows Paint create. Never use that, it’s not optimized and has enormous file sizes.
Also, don’t use TIFF, which is another format not meant for the web.
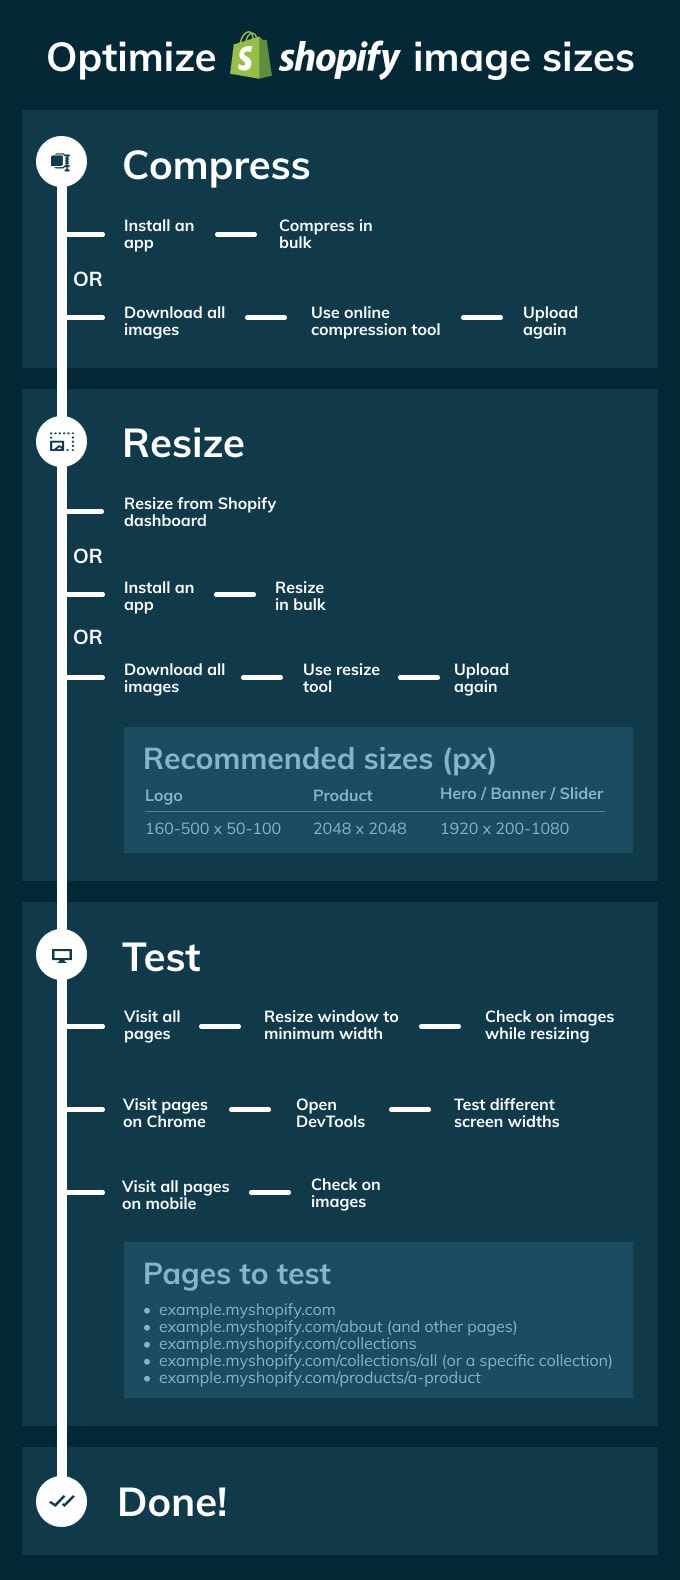
The 3 steps to optimally set up Shopify image sizes
Here’s the important part.
I’m going to guide you, step by step, to set up your images in the best way possible.
Step 1. Compress all the images with an app, or on your PC.
If you’re currently creating your Shopify store, here’s what I suggest:
Keep all of the images in the same place on your PC, and compress them all at once. You can use one of the many tools for that, either online, or not. Read on, I have a section dedicated to this.
If you already have a store, there are two options:
Manual option. Download all of your images from your store. Then compress them in bulk, and upload them again. This is the hard, manual process. In the future, you need to first compress, then upload.
Automatic option. Use an image optimization app, they’re easy to search for on the Shopify App Store. This might cost you a small monthly fee, but you get compressed images forever. Plus other features too.
Step 2. Resize images to set the right size or proportions.
There are three main things we’re doing here to fix Shopify image sizes:
Fixing image ratio (width to height). This prevents a messy layout. (cropped banner and shifting slider examples)
Sizing down some images. If a theme recommends a max size for an image, and you set an image too large, it will appear blurry. (blurry logo example)
Sizing up some images. There’s a chance your theme can’t handle small images, and stretches them. This way they appear blurry and low-resolution.
First, we need to know which images we’re talking about.
We’ll work with a list of images to locate, and go and make sure they are properly sized, one by one.
But first, some things I need to point out.
Differences in themes
Every theme handles images differently in its code.
Here’s how Debutify defines the logo image on the header:
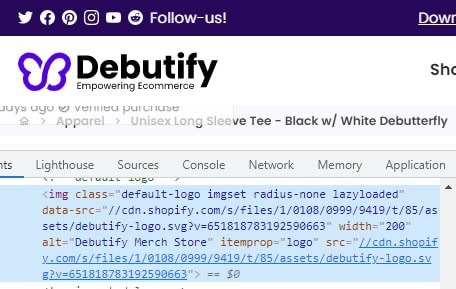
And this is the Dawn theme’s HTML:
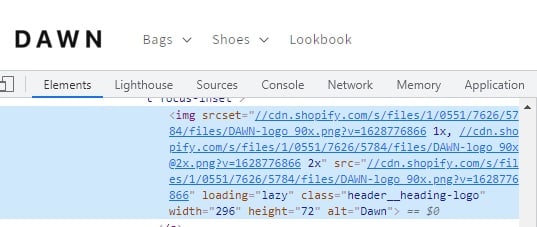
You’ll notice some differences, like class , height , loading , srcset etc.
This goes for all images. Product images, sliders, everything on the theme.
For the non-developer, this means that the steps we’ll follow will be successful as long as the theme is properly coded.
(Although in this case it doesn't mean that a free theme vs. a paid theme is better.)
What’s important here is: it’s all about the theme’s code.
And now that we’re talking about theme code, I’d like to say a few words about how images work under the hood.
The most important detail about Shopify image sizes
To put it in one sentence, themes give browsers a number of different sizes of the same image, to choose from.
When someone visits your store, on the product page, the theme’s code says to the browser:
“I have this product image in sizes 100 x 100, 500 x 500, 1000 x 1000 pixels.”
(Obviously a rough description.)
The browser then checks some details. For example, the screen size of the device, the size of the “space” the image has to fill, and how fast the network is.
Then, the browser decides what version to download. E.g. the 500 x 500 version, because the device is a mobile phone with a screen width of 414 px.
That’s almost always how it works.
(The alternative is just to show one image size on all devices – not good.)
And Shopify allows all this, because when you get a new image, it resizes it into these specific sizes in its servers.
What you need to know is, in reality, there’s no such thing as a single image size (e.g. 1000 x 1000 px) on the page.
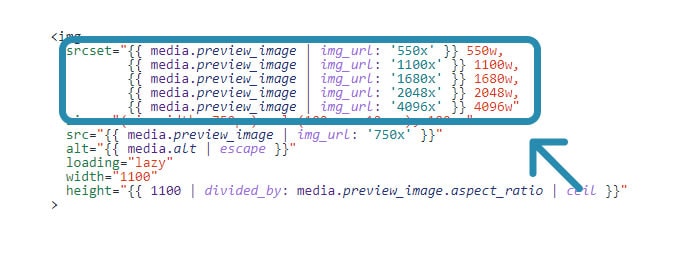
Different image URLs (Liquid code)
Why an image with a “perfect” size can look bad on a mobile device
Another important detail: devices don’t always have the screen dimensions they say they do.
Here’s what I mean:
Let’s say the code of the theme says: “Load a sufficient 500 pixels wide image on the product page, since the device reports a screen width of 390px”.
However, even though an iPhone 12 browser reports this width, its screen can actually fit 1080px. This happens because it has a retina display.
Thus, the 500px image looks bad, since the image is low-res (1080 vs 500).
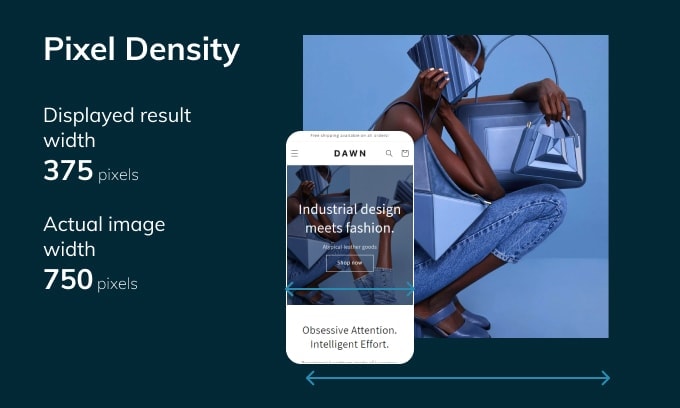
What you need to know is:
Devices have different pixel densities. If you make the assumption that a logo is 80px wide, and you don’t upload a sufficiently large image (2x size), the iPhone version (in this example) will look bad.
So always upload large enough images (Shopify and the theme will take care of the rest).
Let’s start resizing: the images you need to check, one by one
Now that we got these details out of the way, time to do our resizing.
Starting from the top, we have the logo.
What is a good Shopify logo size?
I’d say 160 to 500px width and 50 to 100px height.
A few rules:
1. Don’t go crazy on the height to width ratio. If you do, make sure you set the width to a small number (I’ll show you how to set the logo width in a bit).

Width vs height of logo image file (in red box)
2. Don’t upload a very large image (in pixels) just in case your theme is bad at handling it. Also, don’t upload an image smaller than 2x the width you set on the customizer. So if I set a logo width of 80px in the header settings, I want to upload an image of about 160 – 500 px width.
3. If you have text on the logo, make sure it’s clearly visible on the page, and increase the width sufficiently if it’s not.
What is a good Shopify hero image / banner size?
Depending on how it’s used, I’d say 1920 px width, and 200 to 1080px height.
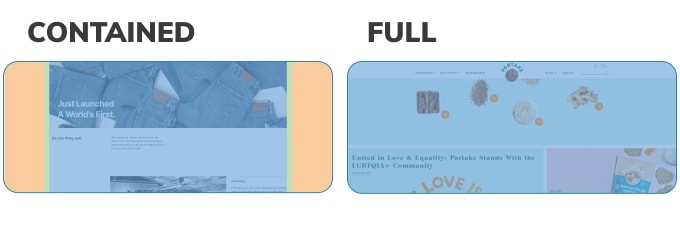
Some images are full width. This means that your theme gives them the entire screen, instead of containing them. In that case, you want them to be large enough for big screens.
The theme should take care of using a smaller image on mobile automatically.
A few rules:
1. Full width hero / banner images grab the user’s attention. Don’t use a width less than the common 1920px because they might look low-res.
2. If your theme has a “Full screen height” option, or something similar, I also recommend not uploading a less than 1080px high image.
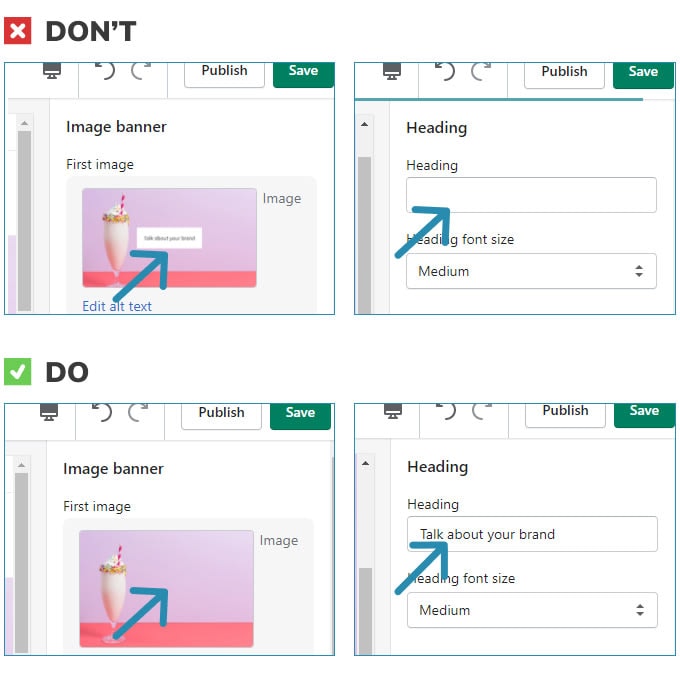
3. I don’t recommend text printed in the image. It’s better to use your theme’s options for the section. If you do include it in the image file, make sure it’s centered enough (more on testing how it looks later).
4. If your theme makes a hero / banner image look short and small on mobile, try uploading a more “square” image file, instead of horizontal.
What is a good Shopify slideshow image size?
As above, I’d say 1920px width, and 200 to 1080px height.
Here, there’s one rule:
Don’t upload images with different sizes, for the same slideshow. Make sure they all have the exact same dimensions.
What is a good Shopify collection image size?
Again, 1920px width, and 200 to 1080px height.
To make it clear, we’re talking about the image you set for the entire individual collection. Not the images of the products in the collection.
What is a good Shopify product image size?
Upload a square image at 2048 x 2048 pixels.
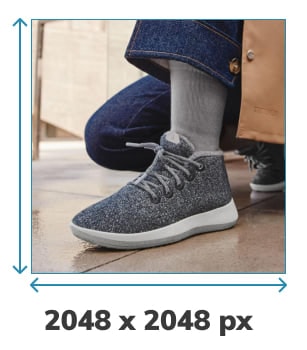
Here’s why:
Square images look good on mobile, compared to wide images.
Also, product images, for most stores, are really, really important.
That’s why you want to give your theme high resolution images to work with.
A few exceptions:
1. If you don’t want to use a square image, at least use a “vertical” image. Or a “horizontal” image that’s as close to square as possible. It will look better on mobile. Just like the banner example.
2. If you don’t have high resolution images, make sure the images are at least 1600px wide. Most themes display the image at full-width on devices with a screen width less than 768px. And you have to account for the 2x resolution we talked about earlier.
How to actually apply the resizing
If you’re creating a new store, use a tool like the Windows Image Resizer (PowerTools).
Simply resize the images in their folders on your PC and then upload them.
If you have an existing store, you’ll need to resize them from within the Shopify admin dashboard. Also, there are apps to do this in bulk. Or download, resize and upload them again.
If you need help, keep reading, I have a section dedicated to that.
Step 3. Make sure everything looks good.
Final step.
Let’s make sure that everything is displayed properly.
Here’s the list of images to check:
Logo
All images on the pages, uploaded in the theme customizer (Homepage, About etc.)
Collection image (if you have set any)
Products in collection page
Product images (featured images and thumbnails)
In pages terms, this would look like:
example.myshopify.com
example.myshopify.com/about (and other pages)
example.myshopify.com/collections
example.myshopify.com/collections/all (or a specific collection)
example.myshopify.com/products/a-product
These are the main pages. There are others like search results, but you’ll rarely see anything different there.
How do I make sure the images are displayed properly?
Here’s the process to make sure you have optimal Shopify image sizes. It will cover 95% of the cases.
First, desktop:
Visit the page on desktop, on a screen at least 1920 px wide (read below if you don’t have one).
Scroll down to the image if necessary.
Resize the window slowly, reducing its width.
Keep looking at the image while the window is being resized. Scroll to it again if necessary. Make sure the image doesn’t look blurry or low-resolution, and doesn’t have any other issues.
Reduce the window width until you reach a limit. On Chrome, this is at 500 pixels.
Then, on a mobile device, here’s all you need to do: First, visit the page. Then, make sure the image looks crisp and doesn’t have a broken layout and position.
Try to check it on both Android and iPhone devices.
There’s a way to simulate mobile devices, from your desktop Chrome too. Read on to see how to do that.
But it won’t be completely representative of the result, since the desktop monitor is not the same as the mobile.
For this reason, always look at images on a real mobile device too.
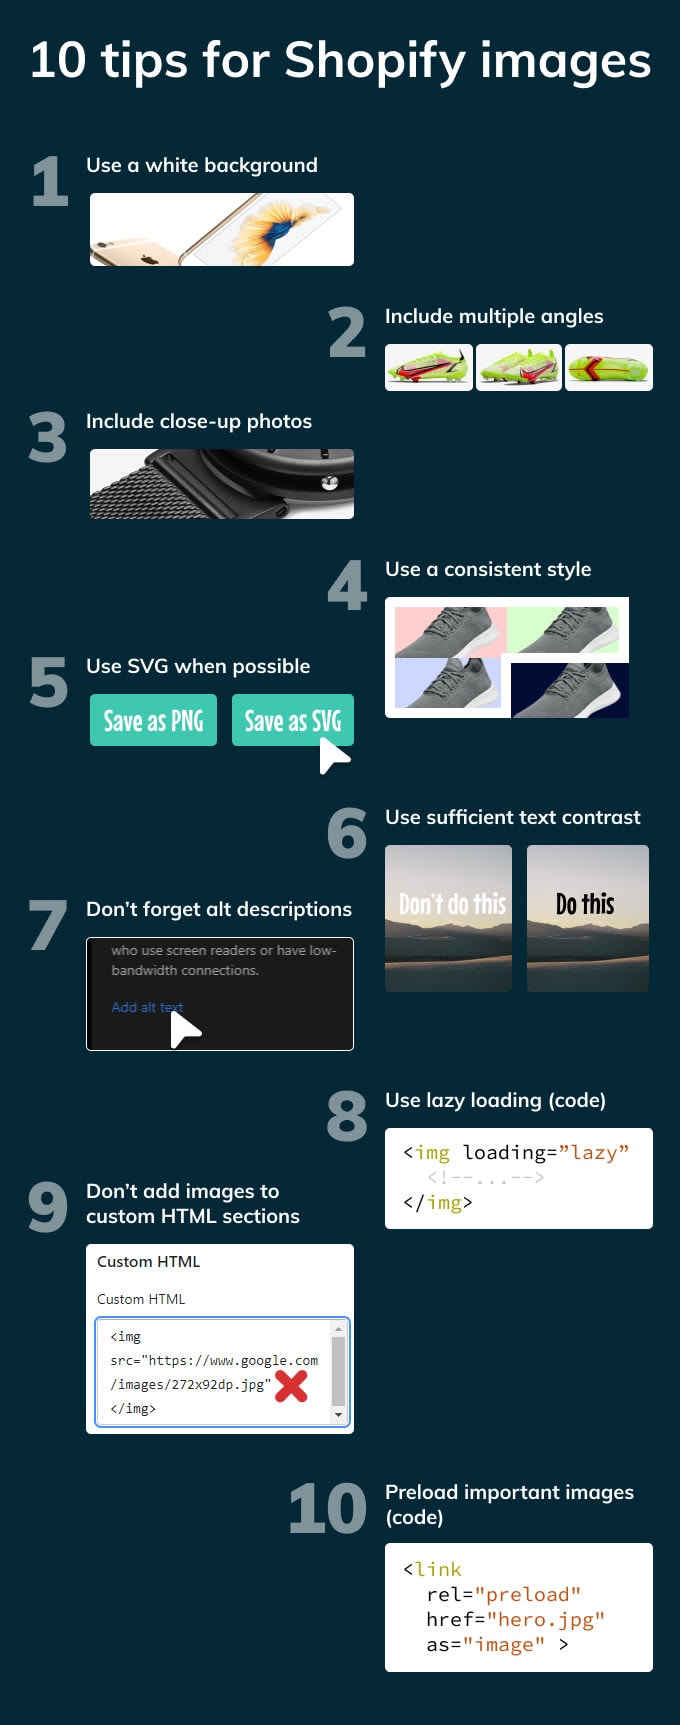
Here’s 10 extra tips when it comes to images
Photography tips
1. Unless you know what you’re doing, prefer a white background for your product images.
2. Take photos of lots of angles of the product. It gives more visual information to the users, which helps them trust what they’re buying.
3. For the same reason, consider including close-up photos of details of the product, like fabric.
4. Take photos with a consistent style. Keep the same artistic sense in all your images.
Technical tips
5. Consider using SVGs.
Replace very simple images (e.g. just shapes and text – a logo) that can be vectorized.
This can reduce size by 90% – we’ve seen why that’s important.
6. Make sure text over images is visible.
There needs to be enough contrast. If you have a bright image of the sky, and white text on top of it, people won’t read the text.
Won’t be able, and won’t want to.
7. Use alt tags for images that are non-decorative.
Accessibility is important. People with visibility limitations use screen readers.
When these readers go through a website, they read alt descriptions. This helps the visitor understand what the image is showing.
Coding tips
8. If you know how to write code in Liquid, Shopify’s templating language, go through the theme’s templates and make sure that all the images are lazy loaded.
It’s also easy to check if you open the Network tab (DevTools) before the page loads, and select “Img”. Make sure you don’t see all of the images downloaded at once.
An exception, the ones above-the-fold. Lazy loading them can delay the LCP.
9. Try not to add images to Custom HTML sections. Prefer to make use of the theme’s capabilities for responsive image sizes.
10. Preloading hero and featured images of products helps with decreasing the time to LCP. Be mindful of responsive image sizes.
(If you know how to code, you'll find some other relevant Shopify optimization tips here.)
Frequently asked questions
How do I upload an image to Shopify?
For your theme’s images: On the Shopify dashboard sidebar, go to Online Store > Themes > Customize (on the theme of your choice). Then, select the section where you want that image. Images you can upload are:
Logo (Header section)
Slider (e.g. Slideshow / slider / carousel section)
General imagery (e.g. Gallery / Image with text section)
Others depending on your theme.
The way to upload, is click on the section on the left > Select Image (or change) > pick one or upload > Select. Don’t forget to save the changes to the theme.
For product images: Go to Products > click on one > Add Media > pick the image > Save the product.
How do I resize an image within Shopify?
For product images: Go to Products > click on one > on Media click on an image > click on the resize icon > set the new dimensions > Save.

For general theme images: Shopify does not let you set a different image size currently. You can use an app for this, or upload a new, resized image.
Tip: When resizing images, you might find it helpful to crop them first. Do this when you want to achieve better looking proportions.
How do I check my images in any screen resolution?
If you want to see how your images will look on any screen size:
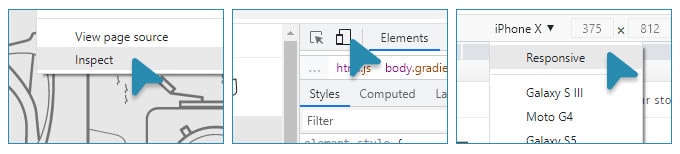
Visit the page on Chrome
Right click anywhere, and click on Inspect
On the DevTools, click on the “Toggle Device Toolbar” icon
Click on the current device name, and choose “Responsive”
You can now freely adjust the dimensions of the screen
Tip: Keep in mind that this is a simulation, and image quality is not always 100% accurate.
How do I bulk compress images?
If you want to bulk compress images you already have on Shopify: Either use an app, or download them and use an online tool.
If you have a set of images on your PC and you want to compress all of them: Make use of an online bulk compression tool. Here’s an example:
Visit batchcompress.com
Simply drag the images from your folder, to the website
Open the resulting zip file, and drag the images to another folder
Upload them again
Tip: Always try with one image and check the quality of the result first.
How do I set a logo width?
Go to Online Store > Themes > Customize the theme > Header > alter the Custom Logo Width.
How do I resize with the Windows Image Resizer tool?
Here are detailed instructions on how to do that, on Microsoft’s website.
How do I add an alt description to an image?
For product images: Go to the product page in admin > click on the image on Media > Edit alt text > Input the new text > Save alt text > Save.
For general theme images: Go to the Section on the Customizer > “Edit alt text” on the image > Input the new text > Save.
Tip: Describe what a person can see when looking at the current image. Google uses alt descriptions when people do Image Search. So also include keywords that you want to target.
How do I fix contrast issues with images and text?
There are a lot of solutions, but here are the main two things you can try:
Change the text color from the Section settings. Use a darker one if the image is bright, and vice versa.
Add an overlay. Some themes have an overlay setting on the Section, so change its opacity.
Tip: Use a contrast checker to pick both the image and the text color, and see how effective the change was.
Conclusion
That’s all the info you’ll need to set up your Shopify image sizes in the best possible way.
It’s a long process, and images are one of the biggest pains in web development.
But these steps will cover you for the most part. And this guide might reveal issues your website has, that you never noticed.
If you have a question about this process, feel free to reach out using the form below.